I have no idea why but this cake really took it out of me, compared to the monstrosity I made last year (which took over a week to make).
This barely took a couple of hours from pulling out the kitchen aid to throwing all the dishes in the sink, but it felt like a lot longer.
Anyway.
I started with my simple sponge recipe. I wanted to fill two 10 inch cake tins so I grabbed six eggs, weighed them and measured out the same weight of butter, SF flour and caster sugar.

Usually I throw everything in the bowl, turn on the machine and walk away but this time I pain stakingly creamed the butter and sugar before adding the eggs one at a time followed by the flour...

Ahem...
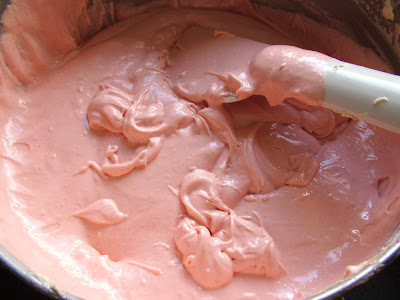
You should end up with a pale fluffy cake batter.

Toots asked if the cake could be strawberry so I added three large spoonfuls of seedless strawberry jam (which didn't change the colour at all) and a couple of drops of food colouring paste.

I divided the batter between the two cake tins and proceeded to make a well in the centre of the cake, smack the pans off the counter and say a silent player that the cakes would come out flat. I hate to trim cakes before decorating them. It seems to me that the structural intergrity of a cake is in the crust and if you have to remove it before adding a fair amount of weight in frosting, well it has just always ended in disaster for me.

In the end the cakes did come out reasonably flat. They had a very slight dome on the top but I fixed that by cooling the cakes upturned which flattened out the slight dome. I wouldn't recommend doing this if the cakes have a large domed top because forcing that amount of cake down on itself will ruin all of the lovely lightness you've worked so hard for earlier on.

I used to decorate my cakes on an upturned plate, but at the end of the day you still have to move it to a cake board or cake plate and there just isn't any point in tempting fate when there is a much better way.
In this case I was using a cake board so I grabbed the board and cut four, four inch wide strips of greaseproof paper. Arrange the greaseproof around the edges of the cake board, you will have a square of unprotected cake board in the centre which the cake will comfortably cover, then plonk the cake in the middle.
I spread a thin layer of seedless strawberry jam on the bottom layer of my cake to try to help that strawberry flavour along a little bit.

I then added a layer of buttercream (250g butter/500g icing sugar/tsp clear vanilla) before placing the second cake on top.
If you plan to completely cover a cake in buttercream then you want to add a bit more buttercream in between the layers than you think you need, once you have the second cake in place press down slightly so that the buttercream is pushed out between the layers.
A little bit of buttercream overflow will make covered the sides a hell of a lot easier, trust me.

Then completely plaster the cake with buttercream. Make sure sure your buttercream goes right down on to the greaseproof paper. Don't worry about making it look too pretty at this stage, just get a good centimetre or so thickness of buttercream over the entire cake.
I always start at the top of the cake and add enough buttercream so that I can spread it right to the edge and then push it a little further to create an overhang of buttercream all around the edge of the cake, then when you come to frost the sides there is very little chance of catching the edge of the cake and pulling any crumbs off.
The trick is to make sure your pallet knife doesn't run dry. Stop spreading about an inch short of where you think you should stop, you'll still have buttercream on the knife and won't risk pulling any crumbs off the cake.
Then put the cake in the fridge for about 20 minutes to chill.
Have a cup of coffee, you deserve it.

Once the cake has chilled a little, get a cup of boiling water, a drying cloth and your pallet knife ready. Alternate holding the knife in the water to heat the blade, drying it off and using it to smooth the buttercream. This method works very well and I prefer it to applying two layers (a crumb layer and a final layer) of buttercream.

I used a little picture of pink panther to decorate the cake (you can just see it in the photo below).
I dyed the leftover buttercream a dark pink and used it to draw the outlines of his face and write Happy Birthday. I still had some left so I added the little swirly bit around the edge.
Then I mixed up some plain icing using icing sugar and a little milk. I used this to make the three different shades of pink, the yellow and the black which I just poured in between the buttercream outlines and allowed it to flow out and fill the gaps.

Then I just whipped the greaseproof paper out from under the cake to leave a lovely clean, splatter free board and called it a day.
I just hope its what Toots had in mind.


How cute! And that pink batter looks so pretty! :) Thanks for all of the tips!
ReplyDeleteI just LOVE that cake! You are so talented.
ReplyDeleteAwesome!
ReplyDeleteJust awesome.
Where's the photo of last year's cake?