skip to main |
skip to sidebar
I love a bit of Victoria sandwich cake. Nothing too fancy or over the top, plastered in frosting or sprinkles. Just a slice of nice traditional cake.First gather your ingredients together and preheat the oven to 180C (350F).I used my simple sponge recipe for this cake.I started with four eggs for a 8inch layer cake. The four eggs weighed 250grams exactly which almost never happens, but makes me very happy so I weighed out 250grams of butter, caster sugar and self raising flour.Place all four ingredients into a large bowl and add one teaspoon of baking powder and one tablespoon of lemon juice which helps to break down the gluten in the flour and make the sponge lighter. Using an electric hand whisk, beat the the ingredients until pale and fluffy which should take five minutes or so.
 Divide the batter between two greased and lined 8 inch cake tins and bake for 25 - 30 minutes. Test the cakes by inserting a skewer into the centre of the cake, it should come out clean or with a couple of moist crumbs but not batter.
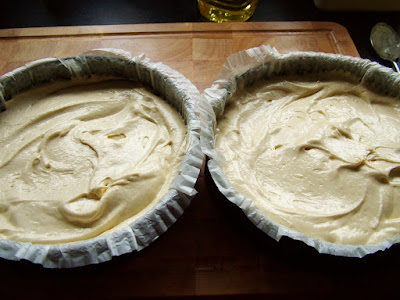 Allow the cakes to stand in the tins for a few minutes before turning out onto a wire rack and leaving to cool completely.
 Once the cakes have cooled completely its time to assemble the cake.Start by choosing which of the two cakes you like the look of best although it doesn't really matter, this is a plain snacking cake and not a fancy display piece, but still.Take the other layer and place upside down on a cake plate (or just with the smoothest side facing up).
 Now here's the thing. I like a bit of butter cream in my Victoria Sandwich but for a lot of people this would be complete sacrilege punishable by death.But I'm hoping that the people who do know where I live, love me enough not to attack me on a dark alley on the way home over a bit of butter cream so I'm going to go ahead and add it. If you really can't stand the thought then by all means leave it out and skip straight to the fruit.
 Spread on a good layer of strawberry or raspberry jam or by all means use fresh crushed fruit. You don't want the layer of jam to be too thick or the top layer will skite about all over the place when you try to cut it.
 Then pop on the top layer and give it a little dusting of caster sugar, not icing sugar. It's the one thing I'm strict about.And you're all done.
 Well, nearly all done.
 There you go. Now you're all done!
 That's a mummy sized bite for anyone interested.

Or Gravy Rings in Northern Ireland.After much faffing, fiddling and finger licking I've finally found a recipe for gravy rings that we love.I try not to make them too often because enriched dough + deep frying + sugar coating = lardy butt. Well, I try at least.These are risen doughnuts so you'll need to plan a bit of time to make them.Raid the larder for;1 pack quick or instant yeast (1/4 oz - 7g)1/8 cup lukewarm water3/4 lukewarm milk (scald and cool or bung in the micro for 30 secs like I do)1/4 cup sugar1/2 tsp salt1 egg, beaten1/4 cup shortening3 1/2 cups plain flour*Add yeast to lukewarm water and add the milk, sugar, salt, egg, shortening and one cup of flour.Using a whisk or handheld beater, beat these ingredients until well combined. It shouldn't take more than a minute and scrape down the bowl as necessary.Fold in the remaining flour and then cover the bowl and leave to rise in a warm place for about an hour.Once the dough has risen and is roughly doubled in size, turn out onto a well floured surface (and I mean well floured). Using your hands press the dough out until it is approximately 1/2 inch thick, then using a doughnut cutter, cut out doughnuts as economically as possible, try not to leave large pieces of dough in between each cut. Alternatively you can do as I do and using a sharp knife cut the dough into squares roughly 2in x 2in, tastes the same and no waste**.Transfer the doughnuts to a greased baking sheet and leave to rise again for 30 - 40 minutes.Once the doughnuts have risen again, fill a pan with vegetable or canola oil and place over a medium/high heat (approx 180C/350F). The oil will need to be at least two inches deep, you can use a smaller pan and cook the doughnuts one or two at a time and save oil.Once the oil has heated, using a spatula, slide the doughnuts gently away from you into the oil and cook on either side for 2-3 minutes or until deep golden brown.Remove the doughnuts to a wire rack*** to drain and cool slightly before rolling in caster sugar.* - Its quite humid in Northern Ireland, but if you live somewhere drier then bear in mind that you may only need as little as 2 1/2 cups of flour so add the flour a cup at a time. The dough should be very soft, but you should also just barely be able to handle it. If you get the feeling that you can work with it quickly, but stay in contact too long and you'll stick like glue, the dough's perfect.** - You will need to put down a good thick layer of flour before turning the dough out and flour your hands well before handling. Once you have cut the doughnuts out, lift each one and quickly toss from one hand to the other to remove some of the excess flour. Because of the amount of flour needed, you can't re-roll this dough as all that extra flour would be incorporated into the dough and you'd end up with a handful of dry, tasteless doughnuts. If waste is an issue for you, cut them into squares.*** - Try not to pierce the surface of the doughnuts when lifting them out of the oil or they'll absorb the excess oil.
We realised this week that out rhubarb had come in. We planted a single rhubarb plant about five years ago now and every year we strip the plant twice and use it for rhubarb crumble. If you like rhubarb, you should really consider getting a plant. It doesn't take up a huge amount of room, it looks quite nice in the garden because of the colour and the huge leaves and it'll pretty grow on a brick wall. Well maybe that's a slight exaggeration, but it is hardy, our plant is in a bit of a boggy corner which doesn't get a huge amount of sunlight and still the plant does well.
Rhubarb is related to celery. It is a bit of an acquired taste, but its very good for you. Personally I can just sit down with a couple of raw stalks and a bowl of sugar, dipping it in and chewing away happily on it, but you may prefer to cook it first.
Firstly, you'll need to remove the very bottom of the stalks along with the leaves and wash the stalks. If the rhubarb was picked a day or two before using you may also want to string it, which just means to peel it. A potato or speed peeler will make it very easy to do.
Would you just look at the mountain of leaves. It does seem a bit wasteful to grow a plant and only be able to eat around a quarter of what it produces, but you can compost the leaves. There's a old wives tales floating around that the leaves will stop or slow the rest the compost but its a load of rubbish. You may want to shred them a bit first because they are huge.
 And of course, because the rhubarb came from the garden I wasn't surprised to find a little stow away.
 Start by chopping the rhubarb into roughly the same size pieces. I cut the thicker stalks into one inch pieces and the thinner ones were one and a half to two inches long.
Once the rhubarb is chopped, throw it in a roasting pan and add around five or six tablespoons of sugar to the pieces before drizzling with about the same quantity of water. Then bake at 180C (350F) for 15-20 minutes. You just want the rhubarb to be fork tender.
While the rhubarb is in the oven, you can make the crumble. I used 8oz of flour for mine because I was using a large dish, but a regular 8-10 inch pie dish will only need 6oz flour.
Just remember that crumble is always half the fat to flour with the same amount of sugar to fat added. So mine was;
8oz plain flour
4oz margarine
4oz sugar
Starting with a knife, cut the fat into the flour and sugar.
Then rub the fat in until you're left with a crumbly mixture resembling large breadcrumbs.
Once the rhubarb is tender, remove it from the oven, it will be nice a glossy and should also be a bit pinker. The rhubarb should still be holding it's shape.
Using a slotted spoon, pile the rhubarb into a pie dish or casserole dish.
Then cover with the crumble and press down slightly, leaving a few rough patches and continue baking at 180C (350F) for 30 to 40 minutes.
The juice from the rhubarb will bubble over the top of the crumbly and become sticky and jammy in the heat.
Serve warm with cold cream or at room temperature with hot or cold custard.
Crumbles are a good way to use up any glut of fruit although you won't need to add extra sugar or pre-bake softer fruits such as berries, eating apples, pears, peaches or plums.
This is a very easy meal to prepare. It takes about ten minutes of your time in preparation and then you can throw it in the crockpot and be done for the day. Alternatively you can cook this on a low/medium heat in the oven for about 2 hours.
The following ingredients are really a guide. You can throw whatever you have handy into this casserole.
I used:
1lb cubed stewing beef (use something cheap, it'll taste much better)
Two large carrots
3 small leeks
1lb mushrooms
About 2 pints of beef stock (cubes are fine)
3-4 tablespoons cornflour
1 tablespoon mustard powdersalt and pepper to taste
I was planning on adding the potato into the casserole as well to save me bothering later but the hubs and daughter wanted mash with this. So be it.


Place the cornflour, mustard powder, salt and pepper into a plastic bag along with the beef and shake well to coat.
 Chop all the ingredients. I used my V slicer, it isn't a necessity but when we went through a phase of eating a lot of stir fry it made life easier.

Soften the leaks in a little oil and butter over a low heat for a few minutes,
 Add the beef to the pan and cook for a couple of minutes just to seal with edges,
 Transfer the beef and leaks to the crockpot, add the carrots and mushrooms and pour over stock. You don't really need to cover the casserole with stock, because no liquid evaporates from a crockpot as it does with other forms of cooking, if you completely cover with liquid, then you'll have to do something to thicken the sauce once its cooked. As it is there should be enough cornflour on the meat to thicken this amount of stock.

I cooked mine for about ten hours on low, although it was cooked before this (it smelt too good and I had to have a taste) so eight hours on low should do it.
Serve with steamed veg and mash or whatever takes your fancy.
I do, I really do.
For some reason I haven't receiived any email notifications of comments left here and I'm very sorry if it seems as though I've been ignorant.
I have no idea why but this cake really took it out of me, compared to the monstrosity I made last year (which took over a week to make).
This barely took a couple of hours from pulling out the kitchen aid to throwing all the dishes in the sink, but it felt like a lot longer.
Anyway.
I started with my simple sponge recipe. I wanted to fill two 10 inch cake tins so I grabbed six eggs, weighed them and measured out the same weight of butter, SF flour and caster sugar.
Usually I throw everything in the bowl, turn on the machine and walk away but this time I pain stakingly creamed the butter and sugar before adding the eggs one at a time followed by the flour...
Ahem...
You should end up with a pale fluffy cake batter.
Toots asked if the cake could be strawberry so I added three large spoonfuls of seedless strawberry jam (which didn't change the colour at all) and a couple of drops of food colouring paste.
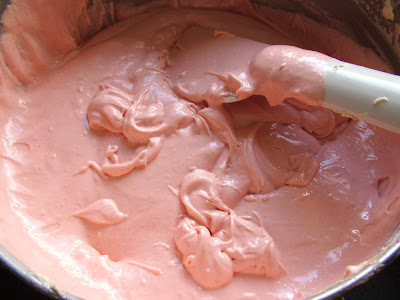
I divided the batter between the two cake tins and proceeded to make a well in the centre of the cake, smack the pans off the counter and say a silent player that the cakes would come out flat. I hate to trim cakes before decorating them. It seems to me that the structural intergrity of a cake is in the crust and if you have to remove it before adding a fair amount of weight in frosting, well it has just always ended in disaster for me.

In the end the cakes did come out reasonably flat. They had a very slight dome on the top but I fixed that by cooling the cakes upturned which flattened out the slight dome. I wouldn't recommend doing this if the cakes have a large domed top because forcing that amount of cake down on itself will ruin all of the lovely lightness you've worked so hard for earlier on.
I used to decorate my cakes on an upturned plate, but at the end of the day you still have to move it to a cake board or cake plate and there just isn't any point in tempting fate when there is a much better way.
In this case I was using a cake board so I grabbed the board and cut four, four inch wide strips of greaseproof paper. Arrange the greaseproof around the edges of the cake board, you will have a square of unprotected cake board in the centre which the cake will comfortably cover, then plonk the cake in the middle.
I spread a thin layer of seedless strawberry jam on the bottom layer of my cake to try to help that strawberry flavour along a little bit.

I then added a layer of buttercream (250g butter/500g icing sugar/tsp clear vanilla) before placing the second cake on top.
If you plan to completely cover a cake in buttercream then you want to add a bit more buttercream in between the layers than you think you need, once you have the second cake in place press down slightly so that the buttercream is pushed out between the layers.
A little bit of buttercream overflow will make covered the sides a hell of a lot easier, trust me. Then completely plaster the cake with buttercream. Make sure sure your buttercream goes right down on to the greaseproof paper. Don't worry about making it look too pretty at this stage, just get a good centimetre or so thickness of buttercream over the entire cake.
I always start at the top of the cake and add enough buttercream so that I can spread it right to the edge and then push it a little further to create an overhang of buttercream all around the edge of the cake, then when you come to frost the sides there is very little chance of catching the edge of the cake and pulling any crumbs off.
The trick is to make sure your pallet knife doesn't run dry. Stop spreading about an inch short of where you think you should stop, you'll still have buttercream on the knife and won't risk pulling any crumbs off the cake.Then put the cake in the fridge for about 20 minutes to chill.
Have a cup of coffee, you deserve it.
Once the cake has chilled a little, get a cup of boiling water, a drying cloth and your pallet knife ready. Alternate holding the knife in the water to heat the blade, drying it off and using it to smooth the buttercream. This method works very well and I prefer it to applying two layers (a crumb layer and a final layer) of buttercream.
I used a little picture of pink panther to decorate the cake (you can just see it in the photo below).
I dyed the leftover buttercream a dark pink and used it to draw the outlines of his face and write Happy Birthday. I still had some left so I added the little swirly bit around the edge.
Then I mixed up some plain icing using icing sugar and a little milk. I used this to make the three different shades of pink, the yellow and the black which I just poured in between the buttercream outlines and allowed it to flow out and fill the gaps.
Then I just whipped the greaseproof paper out from under the cake to leave a lovely clean, splatter free board and called it a day.
I just hope its what Toots had in mind.


