Sunday, 19 July 2009

The Ultimate Chocolate Brownies

No frills, spills, faff or frosting just deep, dark, fudgy, chocolate goodness.

Now, I'm not actually allowed to make brownies any more unless I make enough to go around so this recipe makes a lot of brownies but its pretty easy to cut the recipe down if you're trying to be good. Honestly though, I would and probably could eat this entire batch myself. I'm not saying I'm going, just that I could. Besides if you're going to fall off the wagon anyway, sure you might as well jump.

Start off by preheating your oven to 180C (350F) or 160C if your oven is fan assisted, then gather together your ingredients.

375g dark chocolate
375g butter (unsalted if you have it but if you don't just omit the salt in this recipe)
500g caster sugar
6 large eggs
1 tablespoon vanilla extract
225g plain flour
1 teaspoon of salt (only if using unsalted butter)

Start by putting the butter and chocolate into a heavy based pan and put over a low heat to start melting.


Like so...


While that gets going put the sugar, eggs and vanilla into a large bowl (bigger than the one I started with).


Beat the sugar, eggs and vanilla until combined but you don't need to go light and fluffy with brownies just make sure its all mixed together.


Your chocolate and butter should be pretty much melted by now. I tend to turn off the heat when there are still a few lumps and just swirl it in the pan until they melt. Allow the chocolate and butter to cool slightly, it doesn't exactly need to be cold or even room temperature, just bear in mind that if its too hot you will cook the eggs and you don't want to do that.

Once the chocolate has cooled a little start by drizzling the melted chocolate mixture into the egg mixture whilst whisking the eggs, once you've added about half the chocolate this way you can start to just glug it in there, but still keep whisking.


Next add your flour and salt (if using) and use the whisk again to get it mixed in. Brownies aren't like muffins you do need to make sure the mixture is smooth.


Now for the pan. We like our brownies tall around here so I use a 10 x10 inch pan for them, although for regular depth brownies stick to the 13 x 9 inch pan. Line the pan first with foil or parchment paper and then pour the brownie batter into the pan.


brownies and 40 minutes for If you use the 10 x 13 inch pan bake the brownies for 25 - 40 minutes. I know that sounds like a huge gap in times but 25 minutes will give you gooey brownies, 30-35 minutes for fudgycakey brownies, to each there own and all that.

Because I used the 10 x 10 my brownies took 1 hr 10 mins for fudgy, shave about 10-15 off this for gooey and add the same amount of time for cakey ones. See, simple as!


Let the brownies cool in the pan (I know) for about half an hour before turning them out. If you went for gooey brownies I would suggest leaving them to cool completely in the pan as there's a certain amount of "setting" involved in the really gooey ones and you don't want to risk them falling apart, or worse still a steam burn while trying to get them out of the pan.

Once the brownies have cooled, cut them into as many pieces as you like, bite sized pieces, big flat slabs whatever takes your fancy.


Dust them with a little icing sugar to get across the idea of the craggy surface on top in the photographs although the icing sugar is completely unnecessary:)


Open mouth, cram in entire brownie, lather, rinse, repeat.

Enjoy!

Tuesday, 14 July 2009

Raspberry and Lemon Oat Bars

These bars were inspired by MTM's recipe for Scotch Squares. You should definitely give the original recipe a try as well as this one.

My only real reason for fiddling with the recipe at all was because a) the hubs likes to grab one of these for breakfast in the morning and he has something against eating chocolate for breakfast (yes you heard me right MTM has chocolate in her recipe, but if you go there now without reading this one first I'll know) and b) I originally made them with crushed raspberries just because I had a mountain of them in the freezer after a mammoth berry picking session.

Firstly you'll need to preheat your oven to 180C (350F and gather together your ingredients which are;

1 cup melted butter
1/2 brown sugar (I tend to cut this down to about 1/4 cup)
1/2 cup caster sugar
1/2 tsp almond extract
1 cup plain flour
2 1/2 cups of rolled oats (the regular porridge oat variety are perfect)
1 1/2 tsp baking powder
grated zest of one lemon
1/2 cup of good raspberry jam

Reserve half a cup of oats and set to one side along with the raspberry jam.

Place all remaining ingredients into a large bowl and combine using a spoon or spatula. You don't need an electric beater for this as it's very light and quick work.


Once you have all of ingredients combined, take half a cup of the mixture and put in a separate bowl along with the reserved half cup of rolled oats and use a fork or your hands to combine. This will give you a crumblier mixture than the first.


Place the original oat mixture into a lined and greased 9 X13 pan (mine is actually about 8 X 12 but it all comes out in the wash) .


Press the oat mixture down quite firmly, making sure the mixture is pretty even and the corners are well filled (they're the best bit).


Next take the half cup of raspberry jam and spread it over the surface of the oat mixture. If, like me, you keep your jam in the fridge then stick it in the microwave for 10-15 seconds to loosen it up.


Once the jam has been spread out, take the bowl of crumbly oat mixture and sprinkle it over the top of the jam. This actually works out easier to do if you grab a handful at a time and rub it between the palms of your hands over the top of the pan. It gives a more even coating that way.

You'll notice that I've also sprinkled over a few tbls of coconut just because I can't stop myself from adding coconut to everything at the minute. You don't need to add this and this was my first attempt at adding it in there, but it did turn out pretty damn good.


Then place the pan into your preheated oven and bake for 30 minutes until golden brown and the jam has deepened in colour.


Remove the pan from the oven and leave to cool for about 20 minutes in the pan before scoring into roughly 2 inch squares. Leave (if you can) to cool completely in the pan before serving.


These bars are lovely, light and a little crumbly but they do stand up quite well to the lunch box test.

I may try replacing a small amount of the sugar with golden syrup next time which would make for a sturdier bar and if I have any success with this I'll let you know.

I'd be pretty confident that these would be just as good using strawberry jam or apple sauce in place of the raspberry, or even (nominess) bramble jelly, oh I wish I'd had bramble jelly. Next time!

I'd love to hear any other variations on this recipe that have worked for you. Its such a good base for just about anything.

Thanks MTM for the original inspiration.

Sunday, 12 July 2009

My Victoria Sandwich Cake

I love a bit of Victoria sandwich cake. Nothing too fancy or over the top, plastered in frosting or sprinkles. Just a slice of nice traditional cake.

First gather your ingredients together and preheat the oven to 180C (350F).

I used my simple sponge recipe for this cake.

I started with four eggs for a 8inch layer cake. The four eggs weighed 250grams exactly which almost never happens, but makes me very happy so I weighed out 250grams of butter, caster sugar and self raising flour.

Place all four ingredients into a large bowl and add one teaspoon of baking powder and one tablespoon of lemon juice which helps to break down the gluten in the flour and make the sponge lighter.


Using an electric hand whisk, beat the the ingredients until pale and fluffy which should take five minutes or so.


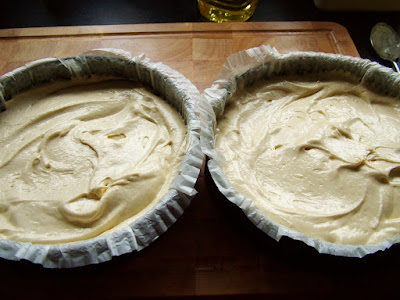
Divide the batter between two greased and lined 8 inch cake tins and bake for 25 - 30 minutes. Test the cakes by inserting a skewer into the centre of the cake, it should come out clean or with a couple of moist crumbs but not batter.


Allow the cakes to stand in the tins for a few minutes before turning out onto a wire rack and leaving to cool completely.


Once the cakes have cooled completely its time to assemble the cake.

Start by choosing which of the two cakes you like the look of best although it doesn't really matter, this is a plain snacking cake and not a fancy display piece, but still.

Take the other layer and place upside down on a cake plate (or just with the smoothest side facing up).


Now here's the thing. I like a bit of butter cream in my Victoria Sandwich but for a lot of people this would be complete sacrilege punishable by death.

But I'm hoping that the people who do know where I live, love me enough not to attack me on a dark alley on the way home over a bit of butter cream so I'm going to go ahead and add it. If you really can't stand the thought then by all means leave it out and skip straight to the fruit.


Spread on a good layer of strawberry or raspberry jam or by all means use fresh crushed fruit. You don't want the layer of jam to be too thick or the top layer will skite about all over the place when you try to cut it.


Then pop on the top layer and give it a little dusting of caster sugar, not icing sugar. It's the one thing I'm strict about.

And you're all done.


Well, nearly all done.


There you go. Now you're all done!


That's a mummy sized bite for anyone interested.

Sunday, 5 July 2009

Homemade Doughnuts


Or Gravy Rings in Northern Ireland.

After much faffing, fiddling and finger licking I've finally found a recipe for gravy rings that we love.

I try not to make them too often because enriched dough + deep frying + sugar coating = lardy butt. Well, I try at least.

These are risen doughnuts so you'll need to plan a bit of time to make them.

Raid the larder for;

1 pack quick or instant yeast (1/4 oz - 7g)
1/8 cup lukewarm water
3/4 lukewarm milk (scald and cool or bung in the micro for 30 secs like I do)
1/4 cup sugar
1/2 tsp salt
1 egg, beaten
1/4 cup shortening
3 1/2 cups plain flour*

Add yeast to lukewarm water and add the milk, sugar, salt, egg, shortening and one cup of flour.

Using a whisk or handheld beater, beat these ingredients until well combined. It shouldn't take more than a minute and scrape down the bowl as necessary.

Fold in the remaining flour and then cover the bowl and leave to rise in a warm place for about an hour.

Once the dough has risen and is roughly doubled in size, turn out onto a well floured surface (and I mean well floured). Using your hands press the dough out until it is approximately 1/2 inch thick, then using a doughnut cutter, cut out doughnuts as economically as possible, try not to leave large pieces of dough in between each cut. Alternatively you can do as I do and using a sharp knife cut the dough into squares roughly 2in x 2in, tastes the same and no waste**.

Transfer the doughnuts to a greased baking sheet and leave to rise again for 30 - 40 minutes.

Once the doughnuts have risen again, fill a pan with vegetable or canola oil and place over a medium/high heat (approx 180C/350F). The oil will need to be at least two inches deep, you can use a smaller pan and cook the doughnuts one or two at a time and save oil.

Once the oil has heated, using a spatula, slide the doughnuts gently away from you into the oil and cook on either side for 2-3 minutes or until deep golden brown.

Remove the doughnuts to a wire rack*** to drain and cool slightly before rolling in caster sugar.

* - Its quite humid in Northern Ireland, but if you live somewhere drier then bear in mind that you may only need as little as 2 1/2 cups of flour so add the flour a cup at a time. The dough should be very soft, but you should also just barely be able to handle it. If you get the feeling that you can work with it quickly, but stay in contact too long and you'll stick like glue, the dough's perfect.

** - You will need to put down a good thick layer of flour before turning the dough out and flour your hands well before handling. Once you have cut the doughnuts out, lift each one and quickly toss from one hand to the other to remove some of the excess flour. Because of the amount of flour needed, you can't re-roll this dough as all that extra flour would be incorporated into the dough and you'd end up with a handful of dry, tasteless doughnuts. If waste is an issue for you, cut them into squares.

*** - Try not to pierce the surface of the doughnuts when lifting them out of the oil or they'll absorb the excess oil.